

I recently moved into a new apartment and could finally consider owning a PC. I wanted to build a desktop for work, running Linux VMs and for Microsoft Flight Simulator. I’m training to become a pilot and I felt it would help me save time and money if I could fly virtually. At the same time, I had to make sure it was quiet since I sleep just next to my PC and am a noise sensitive person. I had not built a desktop for a while before. So I went to the drawing board to build a system that could run everything that I need, while keep the budget not that high. To recap this is what I wanted:
- Powerful hardware where I can switch between gaming and work desktops and can run Linux VMs
- Fanless or close to it
- Small-ish form factor
I felt running Linux hypervisor on the host and passing through the GPU to a Windows guest made a lot of sense for my usecase. That way I would also benefit from a more overall stable system and ability to snapshot, backup, easily switch/migrate my desktop. I could also run other VMs on the hypervisor for homelab usecase.
Hardware build
I ended up settling on the following parts.
| Type | Part | Price (in CAD) |
| CPU+Motherboard | 7900X+Asus TUF B650M-PLUS WIFI | C$780 |
| RAM | Kingston 5600Mhz 64GB | C$240 |
| CPU cooler | Noctua NH-P1 | C$130 |
| SSD | 1TB 980 Pro NVMe | C$120 |
| Case | Asus AP201 | C$110 |
| GPU | ASUS Nvidia 4070 12GB | C$810 |
| PSU | Corsair RM750X | C$150 |
| Total | C$2340+13% tax |
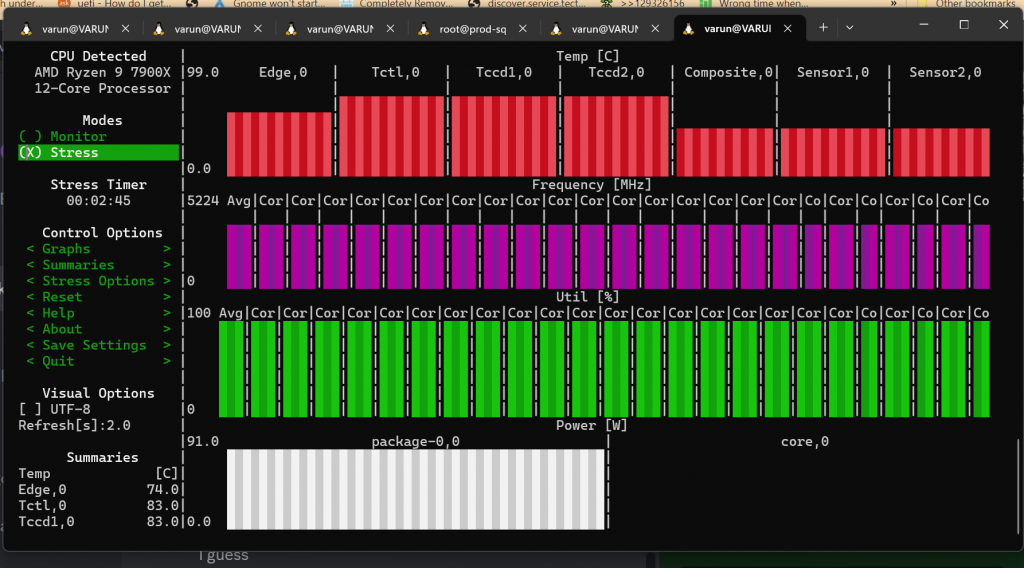
The key thing here is that the components are chosen for the best performance to efficiency ratio. Noctua NH-P1 can cool 7900 CPU without any fans. Asus AP201 case is on the compatibility list for completely fanless natural convection operation. The PSU has a 0dB mode upto 300W of usage and this system is below that even during gaming, with the GPU taking up 180W of power at peak and CPU taking 65W at peak. There are fanless PSU options on the market as well, but they are a little expensive. The only change I had to make was to set ECO mode in the BIOS and limit the CPU to 65W to keep the temperatures in check. The performance difference from being heavily power limited is not much, around 10-15%. This build is as fast as a 5950X, while being almost completely fanless, which is incredible.
The other components are unremarkable. The GPU is one of the cheapest 4070 GPU I could find and has a quiet BIOS that I enabled. Using AMD for the GPU is unadvisable, as most of the cards don’t reset correctly for use with GPU passthrough. The RAM price was good and was on motherboard’s QVL. I debated getting ECC RAM, but ultimately decided to spend that money on flight sim gear instead. I am running ZFS on single disk VDEV without issues. I ran some benchmarks and stress tested the CPU and GPU. The only fan that came on was the GPU fan. Temperatures were within check, with the CPU hitting 87c and GPU hitting 65c. No thermal throttling was observed, but the CPU could not hold turbo clocks. This could be a power limitation more than a temperature one. I also did an unscientific 6 hour long gaming session and temperatures were about the same that I noticed above.
Proxmox setup
I used Proxmox for the hypervisor. The install was relatively unremarkable, but I did have to boot with nomodeset and use fbdev driver to install, since it would not boot with the Nvidia Nouveau driver, which did not yet have support for this newly released card.
- Boot with
nomodesetin bootloader - Run
chmod 1777 /tmp - Run
Xorg -configure - Run
mv /xorg.conf.new /etc/X11/xorg.conf - Replace
nouveauwithfbdevin the file
I used ZFS for my lone disk, which would allow me neat features like COW snapshots. After the install, I created a Windows 11 VM with instructions from Proxmox wiki. You do not necessarily need to use VirtIO(and associated drivers) for disk and network, but you would benefit from improved performance for a desktop setup. After that, I needed to enable IOMMU, disable Proxmox from being able to access the Nvidia card and passthrough the USB controller. You do not necessarily need to do the latter, but you will benefit from better performance and easier setup.
Passthrough GPU to Windows VM
Firstly, you need to enable IOMMU, for which you need to add quiet amd_iommu=on iommu=pt to kernel options. Since I was using systemd-boot, I had to edit /etc/kernel/cmdline and run proxmox-boot-tool refresh. These instructions will change if you are using GRUB. Then I enabled VFIO kernel driver and blacklisted the Nvidia card for use with Proxmox with the following code.
vfio >> /etc/modules
vfio_iommu_type1 >> /etc/modules
vfio_pci >> /etc/modules
vfio_virqfd >> /etc/modules
echo "blacklist nouveau" >> /etc/modprobe.d/blacklist.conf
echo "blacklist nvidia" >> /etc/modprobe.d/blacklist.conf
Use lspci -v and following command to get device ID/vendor ID for blacklisting device with VFIO.
lspci -n -s 01:00 #from lspci -v
01:00.0 0300: 10de:1381 (rev a2)
01:00.1 0403: 10de:0fbc (rev a1)
echo "options vfio-pci ids=10de:1381,10de:0fbc" > /etc/modprobe.d/vfio.conf
Reboot and try booting with VM by passing through the GPU.
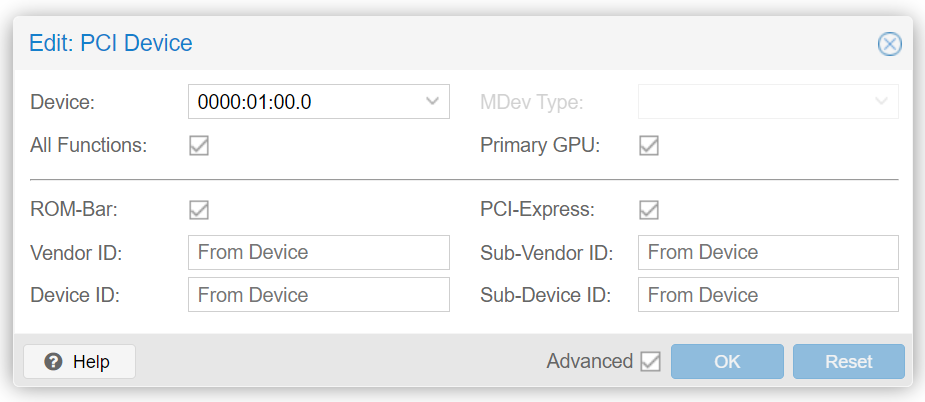
Most likely it should work. If it does, just go ahead and install Nvidia drivers.
Passthrough USB
This was a little more headache than the Nvidia card. You can bind USB devices to VMs and that is an acceptable solution, but I found the latency to be a little high and it to be not as seamless. Some USB controllers don’t reset correctly so I only managed to passthrough one of these, which was fine for my usecase. All you need to do is add this to list of IDs that VFIO driver should bind to in /etc/modprobe.d/vfio.conf as above and then simply passthrough the USB controller with pcie=1 option. After that, everything was running well. I use USB speakers, otherwise you will need to passthrough sound too. The other option is to use audio from GPU.
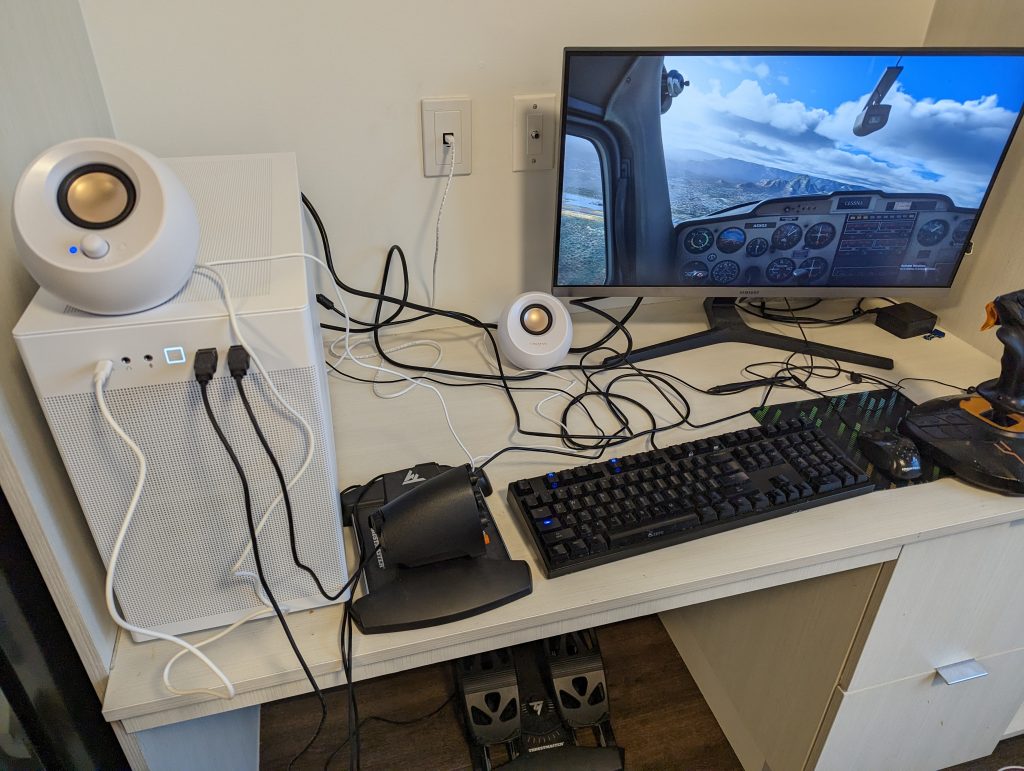
There are some changes I will be making to this setup. I plan to get a nice yoke and Cessna style TPM controller for this setup. Also need to add an another 4K monitor, but need to make space first. I will also be trying to add another desktop to the onboard GPU for another desktop for work. Looking glass is also an interesting project that you could be interested in, which replaces need for a KVM switch with software framebuffer copy.
Have an interesting PC setup or planning to build one? Tell me in the comments below! 🙂