

I needed a dedicated server for running a few VMs. I decided to get a server in Montreal from Kimsufi. This guide should also work with other dedicated server providers, including sister companies of Kimsufi like OVH and SoYouStart. This is a write-up on how to set it up. These are some things that I needed in a server.
- Virtual router to separate public/private networks.
- ZFS file system for reliability, snapshots.
- Additional IPv4 and IPv6 addresses.
- VPN to access private subnets.
- Setup to torrent with rutorrent, NFS, Plex.
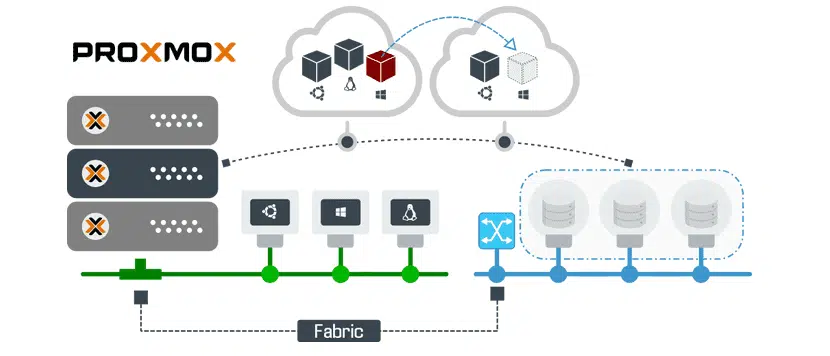
I decided to use Proxmox as my virtualisation distribution and OPNSense for my virtual router. This is not an in-depth guide, but should provide enough pointers on how to go about things.
Intial setup
I decided to go with a server with Intel W3520 CPU, 32GB DDR3 ECC RAM and 2x2TB SATA disks. Kimsufi didn’t have a template for installing Proxmox with ZFS. There are a few ways to work around this, including installing with the recovery mode. After exhausting most options, I was forced to settle for installing Debian on root partition with EXT4 soft RAID.
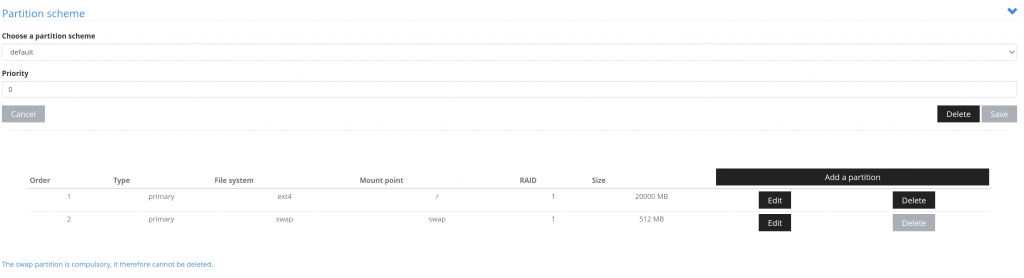
As shown in the image, make sure you use minimal space for the Proxmox OS. You will then have to create partitions and create a ZFS array.
fdisk
zpool create -f -o ashift=12 tank mirror /dev/sda5 /dev/sdb4
zfs set compression=lz4 tank
zfs create storage/share
zfs create tank/share
zfs create tank/share/iso
zfs create tank/share/downloads
zfs create tank/vmstorage
The ZFS array should not be visible and available for use in the Proxmox GUI. Make sure you add the subvolumes for use with Proxmox.

Networking
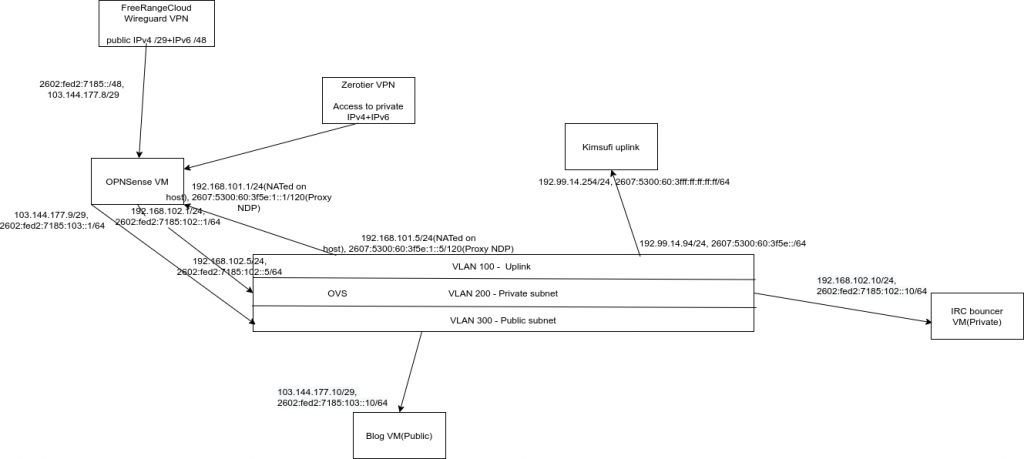
For the networking setup, we will need the following:
- 1x private IPv4 subnet
- 1x publicly routable IPv4 subnet(externally supplied)
- 1x private IPv6 subnet(externally supplied)
- 1x public IPv6 subnet(externally supplied)
- Zerotier VPN to access private subnets
- OPNSense virtual router on VM for routing
- VLAN aware OpenVSwitch
I have made a diagram to better illustrate my setup. Because Kimsufi gives me a limited number of IPs to work with, I decided to use services of FreeRangeCloud, which gave me a /29 IPv4 address block and /48 IPv6 addresses to work with. These are routed to me over a Wireguard tunnel.
Host setup
You can do most of the host network setup using the Proxmox webUI. My /etc/network/interfaces ended up looking like this.
auto lo
iface lo inet loopback
auto enp1s0
iface enp1s0 inet static
address 192.99.14.94/24
gateway 192.99.14.254
iface enp1s0 inet6 static
address 2607:5300:60:3f5e::/64
gateway 2607:5300:60:3fff:ff:ff:ff:ff
iface enp2s0 inet manual
auto int0
iface int0 inet static
address 192.168.101.5/24
ovs_type OVSIntPort
ovs_bridge vmbr0
ovs_options tag=100
iface int0 inet6 static
address 2607:5300:60:3f5e:1::5/120
auto vm0
iface vm0 inet static
address 192.168.102.5/24
ovs_type OVSIntPort
ovs_bridge vmbr0
ovs_options tag=200
iface vm0 inet6 static
address 2602:fed2:7185:102::5/64
auto vmbr0
iface vmbr0 inet manual
ovs_type OVSBridge
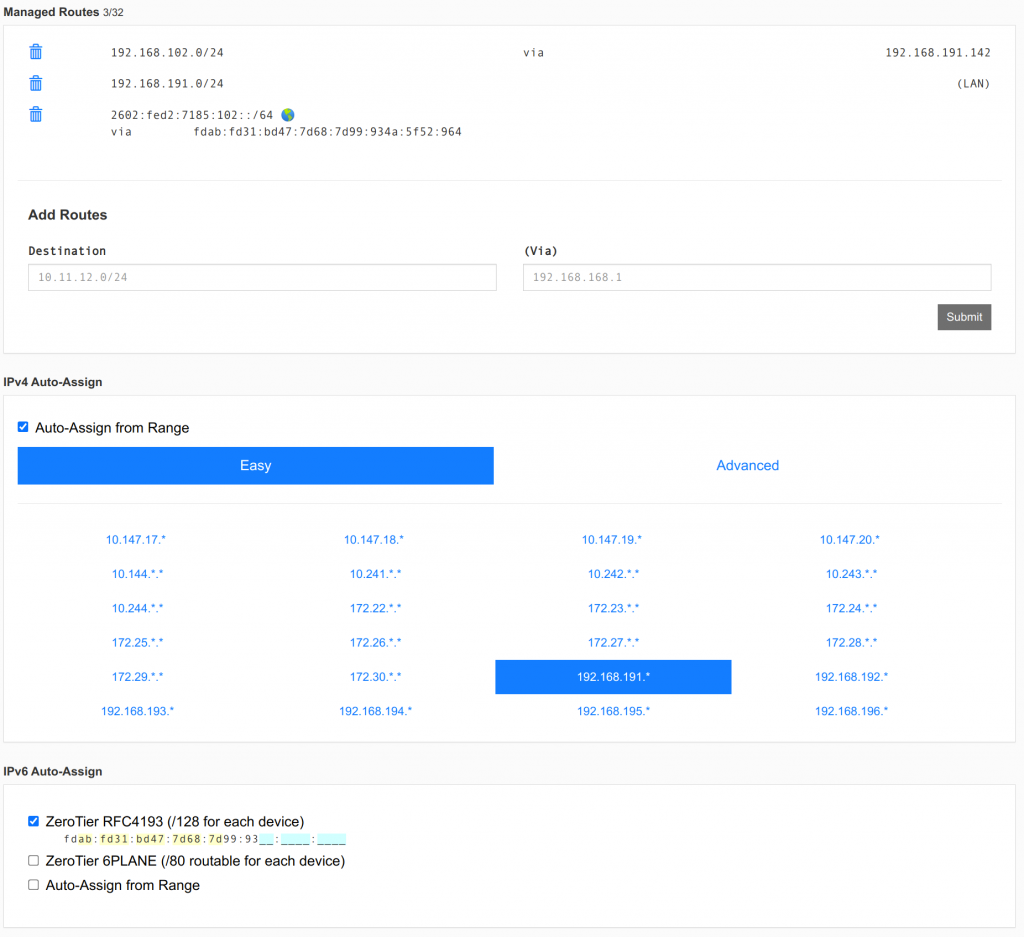
ovs_ports int0 vm0I also had to run extra commands on every reboot. You can use cron for this. This will NAT the private network used for VLAN 100, destination NAT(port forward) for Wireguard and Zerotier VPN, add route to access Proxmox host over Zerotier and proxy NDP for IPv6 used on VLAN 100. The default route is to make sure the private IP of the Proxmox host is available over Zerotier VPN configured later.
iptables -t nat -A POSTROUTING -s '192.168.101.0/24' -o enp1s0 -j MASQUERADE
iptables -t nat -A PREROUTING -i enp1s0 -p udp --dport 9993 -j DNAT --to 192.168.101.1:9993
iptables -t nat -A PREROUTING -i enp1s0 -p udp --dport 36745 -j DNAT --to 192.168.101.1:36745
ip route add 192.168.191.0/24 via 192.168.102.1 dev vm0
ip -6 route add fdab:fd31:bd47:7d68:7d99:9300::/88 via 2602:fed2:7185:102::1 dev vm0
ip -6 neigh add proxy 2607:5300:60:3f5e:1::5 dev enp1s0
ip -6 neigh add proxy 2607:5300:60:3f5e:1::1 dev enp1s0
OPNSense setup
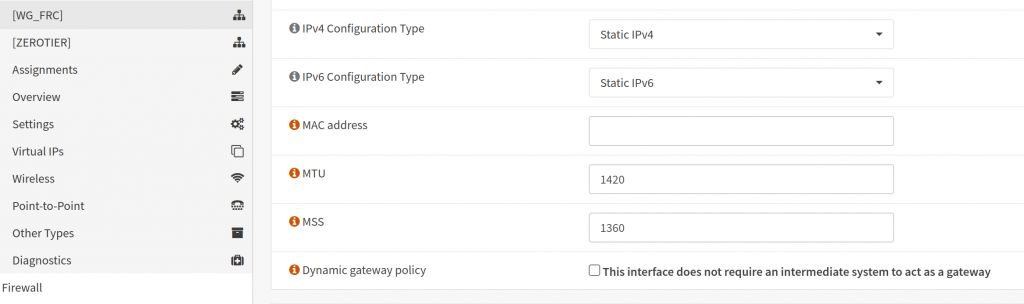
You will need to install OPNSense or any other routing software of your choice on a VM. Mikrotik RouterOS, VyOS, PfSense are also solid choices. Easiest way to access the webUI would be to setup an another VM and use the browser.
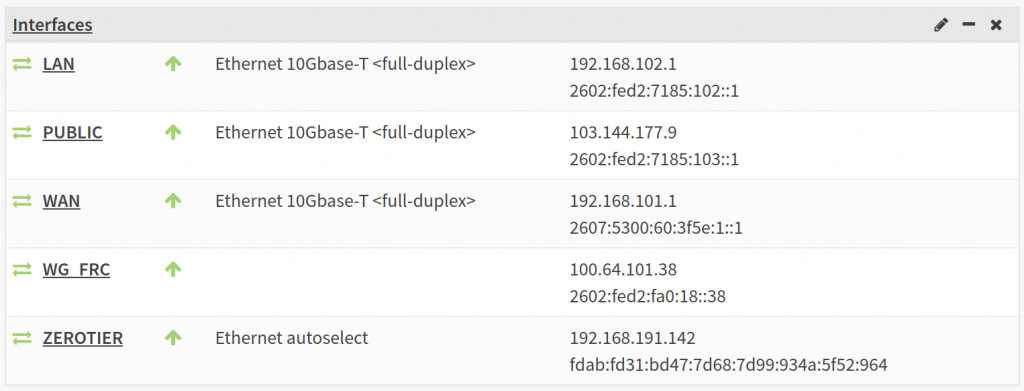
Setting up interfaces should be straightforward. Mine looked like this. You may need to setup firewall rules to secure everything.
Wireguard tunnel
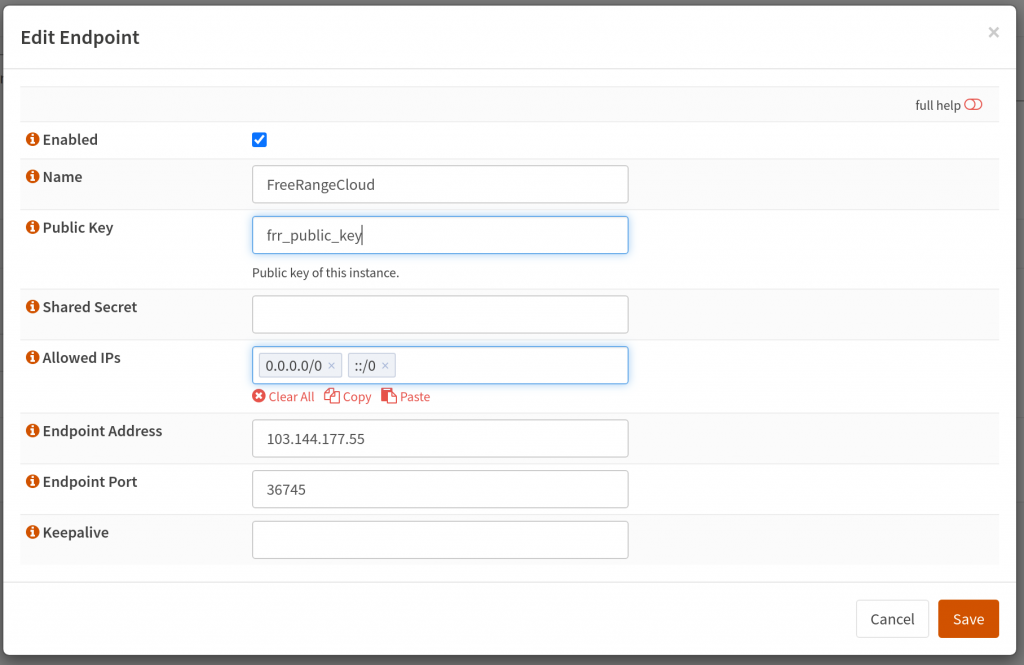
Next, I had to configure Wireguard tunnel with the details given to me by FreeRangeCloud to get additional IP addresses. In addition, I had to create my Wireguard public/private key pair and send it to them.
Server IP is: 103.144.177.55
Server public key is: frr_public_key
Tunnel IP: 100.64.101.38/27
Tunnel gateway: 100.64.101.33
Tunnel routed v4 subnet: 103.144.177.8/29
Tunnel IPv6: 2602:fed2:fa0:18::38/64
Tunnel IPv6 gateway: 2602:fed2:fa0:18::1
Tunnel IPv6 routed subnet: 2602:fed2:7185::/48
My setup on OPNSense looked like this. I also had to add the tunnel to the interfaces list.
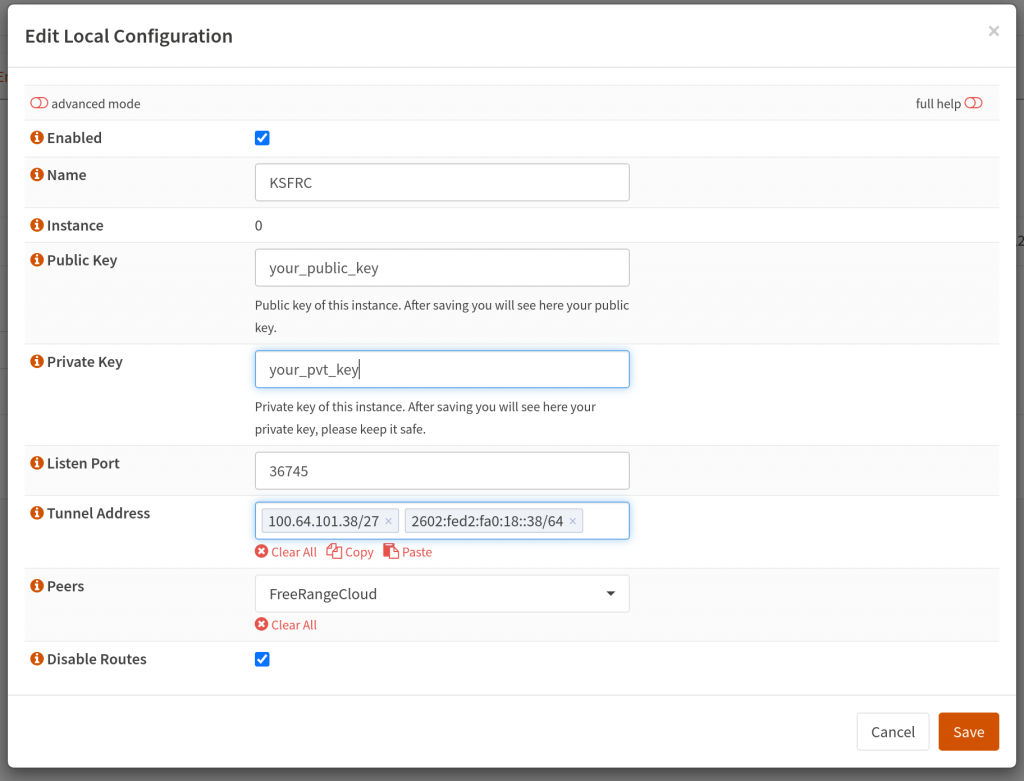
Zerotier
Zerotier has a plugin with OPNSense and configuration is easy. My configuration looks like this. I made sure to route the private subnets to the OPNSense host. This allows me to easily access all the private VMs.
MTU issue
One of the issues I had was that services would fail to work properly over public IPs. I managed to diagnose this as a MTU issue. To accommodate IPv6 packets going over Wireguard tunnel, the MTU needs to be set to 1420. This can be fixed on OPNSense side with setting TCP MSS clamping on the Wireguard interface.
The other place this can be set is in the VM interface or LXC settings(can be set in /etc/pve/lxc/100.conf, replace 100 with container ID).
net0: name=eth0,bridge=vmbr0,gw=103.144.177.9,gw6=2602:fed2:7185:103::1,hwaddr=42:B7:AF:9E:5F:FA,ip=103.144.177.10/29,ip6=2602:fed2:7185:103::10/64,tag=300,type=veth,mtu=1420
One last thing to take care of is to make sure all services like Proxmox/OPNSense webUI are listening on internal IP addresses.
Torrenting setup
For torrenting, I set up 3 containers – for Rutorrent for torrenting and seeding, Plex and NFS for file sharing. The two challenging parts here were:
- Mounting ZFS directory to multiple LXC containers
- Set up NFS file server on LXC container
Mounting ZFS directory on LXC
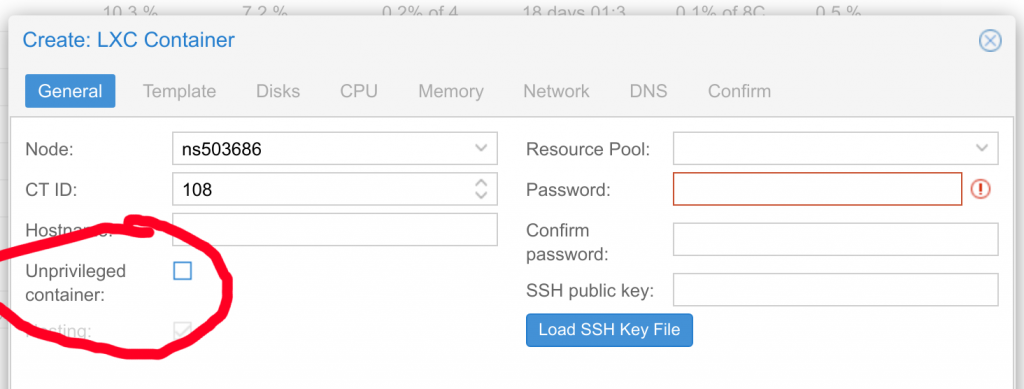
Easiest way to do this is to use privileged containers with bind mount points. You can try mapping UIDs with unprivileged containers, but it did not work very well for me. Firstly, create a privileged LXC container.
After that, in container settings in /etc/pve/lxc/108.conf, you can add in the bind mount.
...
memory: 2048
mp0: /tank/content,mp=/home/rtorrent/content
nameserver: 1.1.1.1
...
That should make it work. Make sure the folder is readable/writable by the user you are planning to use.
NFS file server on LXC container
NFS server does not run on LXC containers by default. I had to create a privileged container and perform the following steps on the host.
# Install NFS-Kernel on Host
apt install nfs-kernel-server

# Create a new AppArmor file:
touch /etc/apparmor.d/lxc/lxc-default-with-nfsd

# Write Profile:
cat > /etc/apparmor.d/lxc/lxc-default-with-nfsd << 'EOF'
# Do not load this file.  Rather, load /etc/apparmor.d/lxc-containers, which
# will source all profiles under /etc/apparmor.d/lxc

profile lxc-container-default-with-nfsd flags=(attach_disconnected,mediate_deleted) {
  #include <abstractions/lxc/container-base>

  # the container may never be allowed to mount devpts.  If it does, it
  # will remount the host's devpts.  We could allow it to do it with
  # the newinstance option (but, right now, we don't).
  deny mount fstype=devpts,
  mount fstype=nfsd,
  mount fstype=rpc_pipefs,
  mount fstype=cgroup -> /sys/fs/cgroup/**,
}
EOF

# Activate the new Profile:
apparmor_parser -r /etc/apparmor.d/lxc-containers

# Add Profile to Container:
# (in this case: id = 200)
echo 'lxc.apparmor.profile = lxc-container-default-with-nfsd' \
  >> /etc/pve/nodes/sniebel/lxc/200.conf

# As well as to it's config:
echo 'lxc.apparmor.profile = lxc-container-default-with-nfsd' \
  >> /var/lib/lxc/200/config
Setup on guest was as follows.
# Install nfs
apt install nfs-kernel-server

# Edit Exports
echo '/home/nfs/content               *(rw,sync,no_root_squash,no_subtree_check)' >> /etc/exports