

This is meant for websites running on a VPS/dedicated servers only. This should work with modifications for static websites but was meant for websites with a database, especially WordPress.
I was inspired by the huge number of really expensive and crap plugins for WordPress to handle backups and my guru/buddy Anurag Bhatia to write this post. This method to backup your website should be much cheaper and should be more secure. First lets choose a provider to store our backups. Backblaze B2 is a cloud storage platform with amazing pricing. So cheap that it costs just $1 to store 200 GB of data per month. This article should tell you how passionate/crazy Backblaze is with your data. The following video should tell you the rest.
Comparision
To give you a perspective let’s compare the cheapest providers for backing up your data.
| Service name | Storage cost/GB/month | retrieval cost/GB |
|---|---|---|
| Amazon S3 | $0.028 | $0.05 |
| Online.net C14 | $0.0025+$0.0125 initial | $0.0125 |
| Backblaze B2 | $0.005(10 GB free on basic tier) | $0.05 |
Online.net C14’s pricing is complicated and is not very good to retrieve small files for the short term. They also round off retrievals to the nearest GB per retrieval/upload of backup and is meant to be more of a long term storage option.
Create a backup user for DB
Type in mysql -u root -p into the Linux terminal and then type in the following:
grant select on db_name.* to ‘backup’@’localhost’ IDENTIFIED BY ‘your_password’;
flush privileges;
Replace db_name, backup and your_password with your database name, user you want to use for backups and the password for this user respectively. This should be better for security. You can replace db_name with * to backup everything.
Setup Backblaze CLI
First thing you need to do is sign up for the service of course. This should be self explanatory. Backblaze has a nice CLI tool written in python. Unfortunately they do not have instructions for Linux. Type these commands in:
sudo apt-get install python-pip
export LC_ALL=C
sudo pip install --upgrade b2
Replace apt-get with whatever package manager your distro uses. Now go to your Backblaze account and get your Account ID and Application Key.
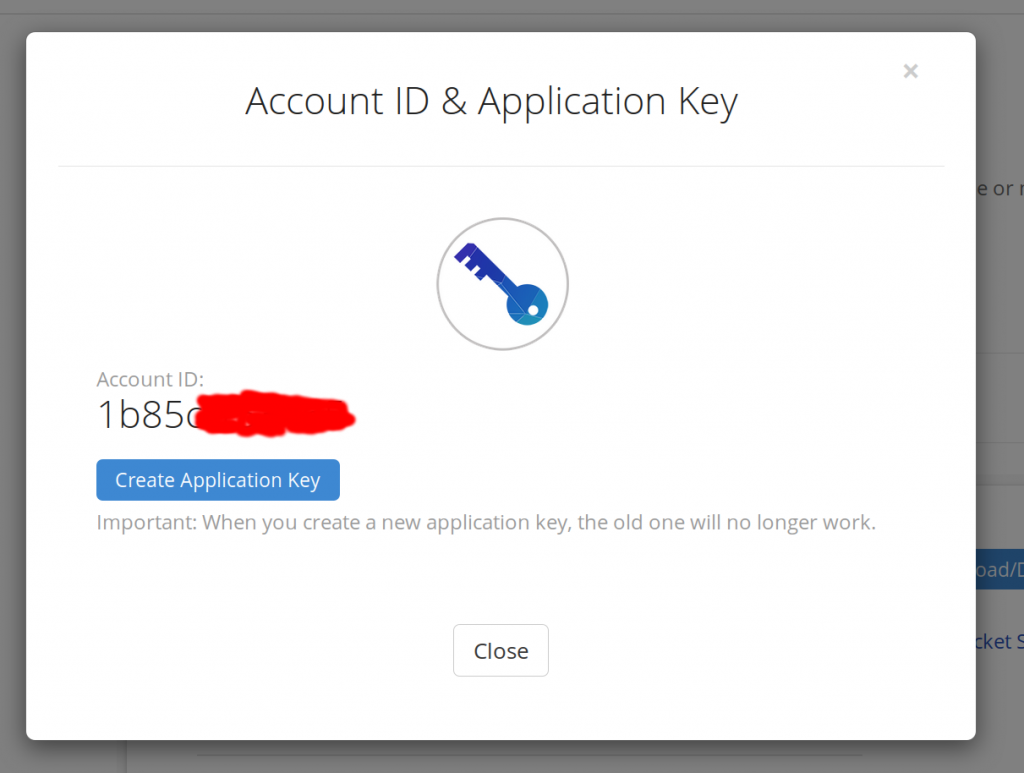
It should do something like this. Now type in b2 authorize_account 07cd01a1cb into your terminal. Replace 07cd01a1cb with your account ID. Type in your Application Key when prompted. Now in the control panel create a bucket. Type in b2 list_buckets in the terminal to confirm the CLI tool works.
Bash script for backups
I’ve written this neat bash script which should backup Nginx configs, Mysql/MariaDB database and the webroot, encrypt it, push it to Backblaze and use SHA1 checksums to confirm that the backups are uploaded correctly. Make necessary changes if you desire. I’m not comfortable with Apache2 but if you use it, it should be easy enough to make necessary changes.
#!/bin/bash
#set web root location
WR=/var/www/html/
#set mysql settings
MQLUSER=backup
MQLPASS=xxxx
MQLDB=mysql-db-name
#set GPG password
GPGPASS=your-gpg-pass
#set BB bucket
BBBUCKET=bb-bucket-name
#set path to backup
PATH1=/path/to/backups
#set file name
FILENAME1=mysql-`date +%s`.sql
WEBROOT1=webroot-`date +%s`.tar.gz
NGINX1=nginx-`date +%s`.tar.gz
#set path+file name
FILENAME=$PATH1/$FILENAME1
WEBROOT=$PATH1/$WEBROOT1
NGINX=$PATH1/$NGINX1
#stop nginx
systemctl stop nginx
echo "nginx stopped"
#compress webroot to .tar.gz
tar -zcf $WEBROOT $WR
echo "webroot compressed to .tar.gz"
#take nginx config backup
tar -zcf $NGINX /etc/nginx/
echo "nginx configs compressed to .tar.gz"
#take mariadb backup
mysqldump --user=$MQLUSER --password=$MQLPASS > $FILENAME $MQLDB
echo "mariadb database backup taken"
#start nginx
systemctl start nginx
echo "nginx started back up"
#compress mariadb backup to .tar.gz
tar -zcf $FILENAME.tar.gz $FILENAME
echo "database compressed to .tar.gz"
#delete .sql file
rm $FILENAME
echo ".sql file deleted"
#encrypt webroot compressed file symmetrically using gpg
gpg --yes --batch --passphrase=$GPGPASS -c -o $WEBROOT.gpg $WEBROOT
echo "webroot encrypted"
#delete webroot compressed file
rm $WEBROOT
echo "webroot compressed file deleted"
#encrypt db backup compressed file symmetrically using gpg
gpg --yes --batch --passphrase=$GPGPASS -c -o $FILENAME.tar.gz.gpg $FILENAME.tar.gz
echo "db backup encrypted"
#delete db backup compressed file
rm $FILENAME.tar.gz
echo "db backup compressed file deleted"
#encrypt nginx compressed file symmetrically using gpg
gpg --yes --batch --passphrase=$GPGPASS -c -o $NGINX.gpg $NGINX
echo "nginx encrypted"
#delete nginx compressed file
rm $NGINX
echo "nginx compressed file deleted"
#sha1sum calculation
#calculate cheksum for nginx
SHANGX=`sha1sum $NGINX.gpg | awk '{print $1}'`
#calculate cheksum for webroot
SHAWR=`sha1sum $WEBROOT.gpg | awk '{print $1}'`
#calculate cheksum for mysqldb
SHAMQL=`sha1sum $FILENAME.tar.gz.gpg | awk '{print $1}'`
set -x #echo on
cd $PATH1/ #change directory to path
#things to upload to backblaze
#upload db backup to BackBlaze B2
b2 upload_file --sha1 $SHAMQL $BBBUCKET $FILENAME1.tar.gz.gpg mysql/$FILENAME1.tar.gz.gpg
echo "encrypted db backup uploaded to BackBlaze B2 bucket:$BBBUCKET filename:$FILENAME1.tar.gz.gpg folder:mysql sha1sum:$SHAMQL"
#upload webroot backupto BackBlaze B2
b2 upload_file --sha1 $SHAWR $BBBUCKET $WEBROOT1.gpg webroot/$WEBROOT1.gpg
echo "encrypted webroot backup uploaded to BackBlaze B2 bucket:$BBBUCKET filename:$WEBROOT1.gpg folder:webroot sha1sum:$SHAWR"
#upload nginx backup to BackBlaze B2
b2 upload_file --sha1 $SHANGX $BBBUCKET $NGINX1.gpg nginx/$NGINX1.gpg
echo "encrypted nginx backup uploaded to BackBlaze B2 bucket:$BBBUCKET filename:$NGINX1.gpg folder:nginx sha1sum:$SHANGX"
set +x #echo off
#delete files
rm $FILENAME.tar.gz.gpg
echo "db encrypted backup $FILENAME1.tar.gz.gpg deleted from local machine"
rm $WEBROOT.gpg
echo "webroot encrypted backup $WEBROOT1.gpg deleted from local machine"
rm $NGINX.gpg
echo "nginx encrypted backup $NGINX1.gpg deleted from local machine"
Save it as filename.sh and run with sh filename.sh. Make sure you have necessary permissions. I prefer to do this as root. Also replace /var/www/html/ with your webroot directory, backup with the database user we just created, xxxx with the password for the database user, mysql-db-name with the database you want to backup, your-gpg-pass with the password with which you want to symmetrically encrypt the backups with, bb-bucket-name with the Backblaze bucket name you want to save this backup to and /path/to/backups with temporary path to backups before running the script.
If everything is successful you should be able to see your backup files in mysql, nginx and webroot directories inside the Backblaze bucket you specified with proper versioning. You can use the command gpg -d -o filename.with.extension filename.with.extension.gpg to decrypt the files. This script does versioning too. You can also make this bucket public to give access to people and only share the password with people who should be accessing it.
Restoring your website from backed up data is far beyond the scope of this post but there are plenty of resources so you should not be lost there.
Public key/Private key encryption with GPG
For people who desire this getting it working is not hard. First you need to import the public key and sign it. Digitalocean has a nice article on this. Then you can simply replace the above bash script from line 43 to 57 with this. Replace you@example.com with your email obviously. You can also encrypt the backups with more than one key if you want to allow access for someone else too.
#encrypt webroot compressed file symmetrically using gpg
gpg --yes --batch -r you@example.com -e -o $WEBROOT.gpg $WEBROOT
echo "webroot encrypted"
#delete webroot compressed file
rm $WEBROOT
echo "webroot compressed file deleted"
#encrypt db backup compressed file symmetrically using gpg
gpg --yes --batch -r you@example.com -e -o $FILENAME.tar.gz.gpg $FILENAME.tar.gz
echo "db backup encrypted"
#delete db backup compressed file
rm $FILENAME.tar.gz
echo "db backup compressed file deleted"
#encrypt nginx compressed file symmetrically using gpg
gpg --yes --batch -r you@varunpriolkar.com -e -o $NGINX.gpg $NGINX
echo "nginx encrypted"
Performance on Backblaze B2
To check this I used the CLI tool to upload/download a Ubuntu image. I got 29 MB/s upload and 10.5 MB/s download from Germany. Comparatively the download speed was 11.8 MB/s from Ubuntu’s mirror.
Afaik Backblaze is US only for now but that shouldn’t matter much for archiving your data. They have also opened up their method to store your data and verifying it’s integrity. You can read about it here. Anyone who’s paranoid can have a look at Tarsnap.
Automation with Cron
Again this article from Digitalocean covers this beautifully.
I simply use @daily /path/to/script/filename.sh after typing in crontab -e.
That’s all folks! This should hopefully have saved you 100s of $s that solutions on the market ask for while not doing a great job at it.
If you found this helpful or if you have anything to add please do consider leaving a comment down below 🙂
Normally I do not read post on blogs, but I wish to say that this writeup very compelled me to try and do it! Your writing style has been surprised me. Thanks, quite great article. dgbfakfefbgg
This is really attentiongrabbing, You’re a very professional blogger. I have joined your rss feed and sit up for in search of extra of your fantastic post. Also, I have shared your site in my social networks!
Thanks Varun for this detailed walk thru and code to use for backups! I have a Linux web server with Vultr.com and want to back it up asap. I added you on skype….lets chat sometime!
my small VPS does not have enough free space (used 80% space) to store local backup files before upload to Backblaze.
Do you have any suggestion? Thanks!